Showing posts with label tutorial. Show all posts

Sunday, July 24, 2016

REMOVE LOCK ON SONY XPERIA - All Sony Xperia Password Remover

This a Tutorial on How To Remove lock On Sony Xperia - SONY XPERIA LOCK REMOVE FILES

Are you trying to WIPE / FACTORY RESET or remove PASSWORD, PIN, PATTERN, GMAIL LOCK on Sony Xperia This another easy tutorial for You.

You might also like
Download Full Sony Xperia firmware from here
Learn how to flash sony xperia from here

Requirement:
PC
SONY FLASH TOOL
YOUR MODEL LOCK REMOVE FILE .FTF - download below

Steps:
Install sony xperia flash tool
Install the drivers you can find the drivers in this directory C:\Flashtool\drivers Flashtool-drivers.exe
Copy your model lock remove file.ftf to C:\Flashtool\firmwares picture below


Open flash tool from C:\Flashtool FlashTool.exe


This Collection of Sony Xperia lock remove files C1504_Xperia E
C1505_Xperia E
C1604_Xperia E Dual
C1605_Xperia E Dual
C1904 _Xperia M
C2004_Xperia M Dual
C2005_Xperia M Dual
C2104_Xperia L
C2105_Xperia L
C2305_Xperia C HSPA+
C5302_Xperia SP HSPA+
C5303_Xperia SP LTE
C5306_Xperia SP LTE
C5502 xperia zr lock remove
C5502_Xperia ZR HSPA+
C5503_Xperia ZR LTE
C6502_Xperia ZL HSPA+
C6503_Xperia Z2 LTE-A
C6506_Xperia ZL LTE
C6602_Xperia Z HSPA+
C6603_Xperia Z LTE
C6606_Xperia Z LTE
C6616_Xperia Z LTE
C6802_Xperia Ultra HSPA+
C6806_Xperia Ultra LTE
C6833_Xperia Ultra LTE
C6833_Xperia Z Ultra LTE
C6843_Xperia Ultra LTE
C6902_Xperia Z1 HSPA+
C6903_Xperia Z1 LTE
C6906_Xperia Z1 LTE
C6916_Xperia Z1S LTE
C6916_Xperia Z1s LTE-A
C6943_Xperia Z1
L39t_Xperia Z1 TD-LTE
LT18i lock remove
LT22i lock remove
LT26i lock remove
LT29i lock remove
Xperia_E4_Dual_E2115_240B38_R5
Xperia C3 Dual D2502_19.2.A.0.391
Xperia C5 Ultra Dual E5533,E5563
Xperia M5 Dual E5633,E5663E,E5643
Xperia M5 E5603,E5653,E5606
Xperia Z5 Dual E6633,E6683
Xperia Z5 E6603,E6653
Xperia Z5 Compact E5803,E5823
Xperia E4 Dual E2115
Xperia E4 Dual E2124
Xperia E4 E2104
Xperia E4g E2043
Xperia E4g E2033
W8 Walkman E16i_2.1.1.A.0
WT19a Walkman_4.1.B.0.587_lock remove
WT19i Walkman_4.1.B.0.587_lock remove
Xperia E3 Dual D2212_18.4.B.1.20_lock remove
Xperia X10a_3.0.1.G.0.75_lock remove
Xperia C C2305_16.0.B.2.16_lock remove
Xperia E C1504_11.3.A.2.33_lock remove
Xperia E Dual C1604_11.3.A.2.1_lock remove
Xperia E1 D2005_20.1.A.2.13_lock remove
Xperia E1 Dual D2105_20.1.B.0.64_lock remove
Xperia J ST26i_11.2.A.0.31_lock remove
Xperia L C2104_15.3.A.1.17_lock remove
Xperia L C2105_15.3.A.1.17_lock remove
Xperia M C1904_15.4.A.1.9_lock remove
Xperia M C1905_15.4.A.1.9_lock remove
Xperia M Dual C2004_15.5.A.1.5_lock remove
Xperia M Dual C2005_15.5.A.1.5_lock remove
Xperia M2 Aqua LTE-A D2403_18.3.C.0.37_lock remove
Xperia M2 Dual D2302_18.3.B.0.31_lock remove
Xperia Neo MT11i_4.1.B.0.587_lock remove
Xperia P LT22i_6.2.A.1.100_lock remove
Xperia play R800i_4.0.2.A.0.62_lock remove
Xperia Ray ST18i_4.1.B.0.587_lock remove
Xperia SL LT26ii_6.2.B.1.96_lock remove
Xperia SP C5303_12.1.A.1.205_lock remove
Xperia T LT30p_9.2.A.1.199_lock remove
Xperia T2 Ultra Dual D5322_19.1.1.C.0.56_lock remove
Xperia Tipo ST21i_11.0.A.4.22_lock remove
Xperia U ST25i_6.1.1.B.1.10_lock remove
Xperia V LT25i_9.2.A.2.5_lock remove
Xperia X8 E15i_2.1.1.A.0.6_lock remove
Xperia X8 E15a_2.1.1.A.0.6_lock remove
Xperia X10 Mini E10a_2.1.1.A.0.6_lock remove
Xperia X10 Mini E10i_2.1.1.A.0.6_lock remove
Xperia X10 mini pro U20a_2.1.1.A.0.6_lock remove
Xperia X10 mini pro U20i_2.1.1.A.0.6_lock
Xperia X10i_3.0.1.G.0.75_lock remove
Xperia Z C6602_5.1.A.0.283_lock remove
Xperia Z LTE C6603_10.5.1.A.0.283_lock remove
Xperia Z1 C6903_14.4.A.0.108_lock remove
Xperia Z1 Compact LTE-A D5503_14.4.A.0.108_lock remove
Xperia Z3 Compact LTE-A D5803_23.0.A.2.93_lock remove
Z1 C6602_4.3_lock remove
Xperia C4 Single sim E5303, E5306, E5353
Xperia C4 Dual E5333, E5343, E5363
Xperia M4 Aqua Dual E2333, E2363_16GB
Xperia M4 Aqua E2303, E2353_8GB
Xperia M4 Aqua E2306_16 GB
Xperia_C3_D2533_192A0391
Sony Xperia M4 Aqua Dual E2333 Xperia E4 E2104 24.0.A.5.14_R4A

2015 & 2016 Model 
Use Latest Version Flash Tool (0.9.19.10)
You can Get this files one BY one from here
   Download all @ a Time From here  2.1GB

Wednesday, July 20, 2016

HOW TO REMOVE PASSWORD LOCK ON NOKIA MTK With Nokia 220 rm 1035


This Vedio will show you how to remove password lock on Nokia MTK
Supported Model 
RM 1035
RM 969
RM 1011
RM 1133
             RM 1136      e.t.c

Requirement :
Miracle box download the cracked version from here
Nokia MTK driver download from here
Phone to unlock., Nokia 220 Rm 1035 etc
Pc
usb cabble


Steps:
open miracle box
under MTK tab
tick Format 
a pop will prompt you to backup.. select NO
remove the phone battery an insert it back
plug in usb cable 
wait still process Completed
Done !
Remove the battery an Power on  
video guide below

How To Create Custom Boot Logo Mtk Devices Using WiselinkTool


How to create custom boot logo on Mtk Devices Using WiselinkTool
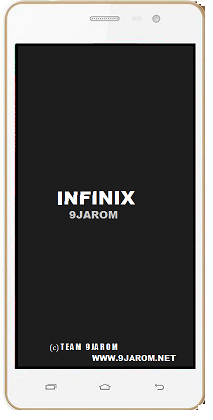
This is just another tutorial on how to create a custom boot logo like the one in the image above for MTK devices using WiseLink Tool. Its easy and straight forward. Just watch the video or follow the tutorial below.


Today I will be sharing with you a tutorial on how to create boot logo on mtk device using wiselinkTool
Logo.bin: this is the first image you see when your device boots up. It contains the first boot image and also all the battery charging icons. This file is found inside your backup folder that means you must have an mtk backup of your rom to access this file.

Requirements:
Install mtk mt65xx drivers
Download and install WiseLink Tool from here
Stock ROM of the phone you want to flash  (optional)
NB: You can also extract logo.bin from devce using Miracle Box or MTK Droid Tools.
SP Flash Tool to flash the new logo.bin created
Design the image you will want to be the new logo of your device

Steps:

Launch WiseLinkTool

Click on Custom tab


Click LOGO button

Navigate to the Stock ROM folder and select logo.bin file

After a few seconds, the stock logo will be loaded.

Now click on Replace Boot Logo button and select the custom image you designed

Again click on Replace Android Logo and select the custom image you design

After replacing the image for both Boot Logo and Android Logo,

Click on Save LOGO button

Select path and click save button.

You have now succeeded in creating a logo.bin file

To flash this new logo.bin file to the device,

Copy the newly created to the stock rom folder (replace old one)

Launch SP Flash Tool or WiseLinkTool


Click on Scatter Loader

Select Scatter file

Tick ONLY LOGO

Click Download button

                             Connect device and wait for flash process to complete        -> takes about few secs

Reboot your phone 
Done.
If you have any question, drop it in the comment box.
If this has been helpful don’t forget to share

Tuesday, July 19, 2016

How To Flash / Unbrick HTC Devices With RUU Files


HOW TO FLASH / UNBRICK OR UPGRADE HTC PHONE WITH RUU FILES 

How to flash/unbrick HTC device if you messup either by rooting, installing some custom rom etc or you just want to get back to the default stock rom, follow the simple guide below.

Note:
A wrong RUU will not install on your device. 
If you want to install ruu files of different variant of your device you will need to be on super CID.
Download an install android usb drivers from here

Boot up your phone by pressing volume down and power button


Check the model of the device you want to flash eg M7_WL.


Check the radio version (very important).

                                                                         radio version
Use power button to select Fastboot on your device.

Download the RUU file of your device. Make sure the file you are downloading has the same radio version with the one of your device. Get RUU files from here

Launch the RUU file.


When it loads, tick I understand the caution...... and select NEXT


Now connect your phone to the computer using a usb cable.

Tick the box and select NEXT

A new pop up will appear Click UPDATE.


Verify the images of the ROM you want to flash and click NEXT.


Flashing Process will begin.


This process can take about 10 mins.
Wait for the process to complete. Please do not disturb the device or it might end up hard bricked.

Phone will reboot after the process is complete.

First boot after this process is longer than usual.

Monday, July 18, 2016

HOW TO CHANGE THE BOOT LOGO ON MTK DEVICES USING LOGO BUILDER


HOW TO CHANGE THE BOOT LOGO ON  MTK DEVICE USING LOGO BUILDER


One of the things On MTK devices the ability to customize your device to your very taste. Right from the booting up to shutting down.

Today I will be sharing with you a tutorial on how to change your boot logo on mtk device.

Logo.bin: this is the first image you see when your device boots up. It contains the first boot image and also all the battery charging icons. This file is found inside your backup folder that means you must have an mtk backup of your rom to access this file. 

Logo_bin: this is the second image that appears when your device is booting up. This image appears very quickly just about 3 secs. You can find this image inside your phone. It’s located inside

/system/media/image/logo_bin.

Requirements:
Pc.
Mtk backup of your rom.
Logo builder. Download here.
File Manager. Preferably Root explorer. Download here.
Custom recovery. CWM OR TWRP
Sp Flashtool (optional) download here.
Brain

How to change logo.bin:1. First you have to copy the logo.bin file from your mtk backup folder to the desktop.
2. Extract “LogoBuilder_v1.5.1”, open the folder and launch logo builder.


3. In the next screen that appears, just click on close.

4. Click on create project.


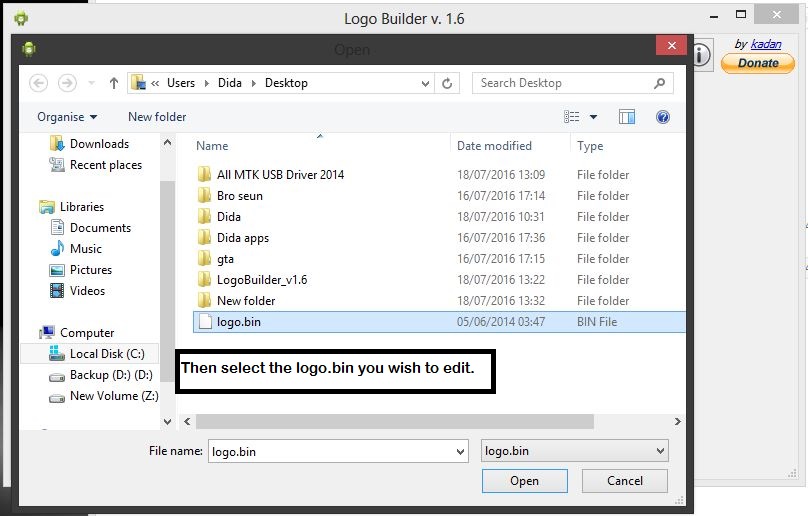
5. Select the logo you copied earlier and click open.


6. Select an empty folder or you create a folder where you will like to extract the files and click ok


7. The logo.bin will be extracted. You will see a copy in the logo builder window.


8. Go to the folder where you extracted the files and edit any of the images.


9. Make sure you use the same resolution and also rename the image you want to use to the same name as the one you want to replace.
10. Once you are through editing the images. Go back to the logo builder and click on make.


11. After re packing, a flashable zip  and logo.bin  file will be created.


12. Open the folder where you extracted the logo.bin and copy the update.zip file.
13. Paste the update.zip in the root directory of your sd-card and flash through recovery.
14. CONGRATULATIONS!!! You have just successfully changed your boot logo.

N.B:
“For advanced users, you can also flash the logo.bin you see in the folder with sp flash tool.
“It’s not compulsory the images you use are png, just rename any image to png.
“Make sure the file size of the image you are using is not too large.

Second Image.
How to change logo_bin:
1. Open the logo builder if you have closed it.
2. Click on the second BL as shown in the image below.


3. Select any image you want to use and click open (make sure the image resolution is the same resolution as your device).
4. Select the folder where you will like to save the image and click on save.
5. Now open the folder where you saved the file and copy it to your sd card.
6. On your phone use any root file explorer (preferably root explorer)
7. Copy and paste the logo_bin from your sd-card to /system/media/images/
8. That’s all. Now you are done.


Tip: you can also create the logo_bin by just dragging any image on to the logo builder.
Though this has been tested on different mtk devices without any error. 9jarom won’t be held responsible for any damage done to your device.

Credit goes to  KADAN. the developer of this software.


If you have any question, drop it in the comment box.
If this has been helpful don’t forget to share

Thursday, July 14, 2016

How To Download Samsung Firmware Completely free with no download speed restrictions.


How To Download Samsung Firmware Completely free with no download speed restrictions.


fw.updato.com lets you download any samsung firmwares / Stock ROMs,
Completely free with no download speed restrictions. 
To download Any samsung stock ROMs 

enter your device model number 
select Android Version


Download Now


After downloading this firmware lean how to flash / use it below or from here

Download an install samsung usb drivers from here.
Download odin (latest version preferred) from here
Launch odin
Make sure only Auto Reboot & F. Reset Time is ticked.

Put your device into download mode by pressing down Volume Down > Home > Power key
Press volume up on the screen that has a yellow triangle to get into odin mode.

Connect the device to the computer.
Added!! will be seen showing the device has connected successfully.

Click on AP (new versions of odin) or PDA (older versions of odin).
Navigate to the folder containing the rom of the device.
Select the rom. (roms names always end with .tar or .md5).
Wait for odin to process the rom.
Click start.

The flashing or upgrading process will now begin.
A green progress bar will be seen at the top left.
This process will take about 8 mins or more (depends on the size of the rom.
When you see PASS! at the top of odin GUI know that you have successfully flashed or upgraded the device

The device will reboot.
First boot after this process takes time. Be patient.......................

Do a factory reset if phone bootloops.
Press Volume up > Home > Power key
Select factory reset.
Scroll down to Yes. 

 Download the Android app 

let Us know what kind of mobile phone firmware you are still searching for in comment box ..

Thursday, June 30, 2016

How To Change Stubborn MTK IMEI

Sometimes after wipe/flashing or upgrading an MTK device, the IMEI number corrupts
an if you dial *#06#, it shows  invalid imei or null which leads to no network on the device. 
they're so many Apps & Tools to Fix/Repair  this like chamlephone, mtk drod tool, but sometimes they need requirements like root access on that device.
I will be showing you how to restore, repair, or change this null/invalid imei number of your mtk device back to your original one.without root access 
Note:
Changing of imei number is illegal. 9jarom will not be held responsible for any damage cause by using this tutorial. Use at your own risk.
This tutorial will show you how Fix/change sturborn mtk IMEI withou root Access
What Needed. GSM ALLDIN 
Download crack version from here if you dont have
THIS WORK ON ALL NEW CHIPS
MT6592
MT6580
MT6752
MT6735
MT6735P
MT6753
ETC..


STEP:
Launch gsm aladdin
under mtk tab
click on common
tick repair_imei
type 15digit {imei}
tick Android
tick New
@ top click start
power off the phone 
and plug usb cable
wait still process complete
Done.
Make a comment below if tutorial  helpful..


How To Fix/Change Mtk IMEI Without Root Access

Sometimes after wipe/flashing or upgrading an MTK device, the IMEI number corrupts
an if you dial *#06#, it shows  invalid imei or null which leads to no network on the device. 
they're so many Apps & Tools to Fix/Repair  this like chamlephone, mtk drod tool, but sometimes they need requirements like root acess on that device.
I will be showing you how to restore, repair, or change this null/invalid imei number of your mtk device back to your original one.without root access 
Note:
Changing of imei number is illegal. 9jarom will not be held responsible for any damage cause by using this tutorial. Use at your own risk.


 Launch MTK Engineering


Click on MTK Settings


Swipe to connectivity tab and click CDS Information


Click Radio information

Select the sim you want to repair, change. Phone 1 for sim 1 and phone 2 for sim 2


Tap after the AT+ and press letter 'e' on keyboard
Select EMGR=1,7,"" if you are changing for sim 1
Select EMGR=1,10,"" if you are changing for sim 2
Between the quotation marks, enter the imei number eg. AT+EMGR=1,7,"12345678901234"
Now press SEND AT COMMAND

A small notification will appear at the bottom showing >> AT command is sent <<
If the notification shows >> This command is not allowed in UserBuild <<

Add a space between the AT+ & E eg. AT+ EMGR=1,7,"12345678901234" 

press SEND AT COMMAND.


Thas all you have Fix/change your imei number
having problem wit this tutorial? make a comment below
Is there any other way you Fix/changed mtk IMEI without root access?

Monday, June 27, 2016

Tutorial How To Flash iTEL Feature Phonez Using Miracle Box


How To Flash iTEl Feature Phone Using Miracle Box
This a tutorial on how to flash itel feature phone using miracle box


Requirment :
  •  Miracle box or Any other Chinese Tools 
  • SPD Feature PhoneS
  • USB CABLE
  • Computer
  • Brain
Flash Tutorial:
How to flash iTEl devices with .pac file using researchdownload & UpgradeDownload Tool. 


How to flash iTEL Feature phones with .bin file using Miracle Box below >>
Launch Miracle Box
Click on SPD tab
Tick Write
Under Choose type, Select the chip of the device you want to flash {6531 xxxx}
Click the small yellow folder
Navigate to the ROM/Firmware folder and select the bin file
Click Start button
You will see Scanning USB Serial port...
Connect device to PC while holding boot key (soft menu or call key)
Miracle will detect the phone and start flashing process
When you see Done! Flashing process is complete 
Disconnect and boot up phone


Picture Guide  .


Saturday, June 18, 2016

How to remove privacy password protection on mtk device

How to remove privacy password protection on mtk device using miracle box

This easy guard will guide you on how to remove privacy password protection on mtk device using miracle box crack


Guide:
Download miracle box latest version from here
Launch Miracle Box
Under MTK tab click Unlock/Fix
Tick Clear Anti-theft
Click Start button
When the backup flash pop up appears, Select NO
Connect the device to PC
Miracle Box will detect the device and start the process
When you see Done!, the process is complete
Disconnect and reboot phone

Note
First boot after this process is a bit longer than normal
See Picture Guide below


see picture guide below


HOW TO REMOVE FRP LOCK ON MTK DEVICES

HOW TO REMOVE FRP LOCK ON MTK DEVICES
Am going to show you how to remove factory reset protection {FRP} on mtk device 


WHAT IS FRP {factory Reset rotection} ?.

Factory Reset Protection (FRP) is a security method that was designed to make sure someone can't just wipe and factory reset your phone if you've lost it or it was stolen. Starting with Android Lollipop, FRP is "standard" in vanilla Android, and most companies making our phones have implemented it in their own models. It's a good thing — it makes a stolen phone harder to use, which makes it less appealing to thieves, and anything that can protect our data on a phone we've lost is welcome.
      The problem is that people are selling or trading or even giving away phones with FRP enabled and this makes things difficult for the next user.

How it works explains why. If you reset a phone with FRP enabled, you have to provide the user name and password for the last Google account that was registered with the device. There are random work-arounds on the Internet, but they tend to get patched almost as soon as they are discovered. You'll pretty much need to know the login details for the last account to use the phone before you can do anything with it if FRP was enabled before you reset it.

With these easy step am goin to show below
Downnload miracle box latest version here
Launch Miracle Box
Under MTK tab click Unlock/Fix
Tick Clear Settings/Frp
Click Start button
When the backup flash pop up appears, Select NO
Connect the device to PC
Miracle Box will detect the device and start the process
When you see Done!, the process is complete
Disconnect and reboot phone

Note
First boot after this process is a bit longer than normal
See Picture Guide below